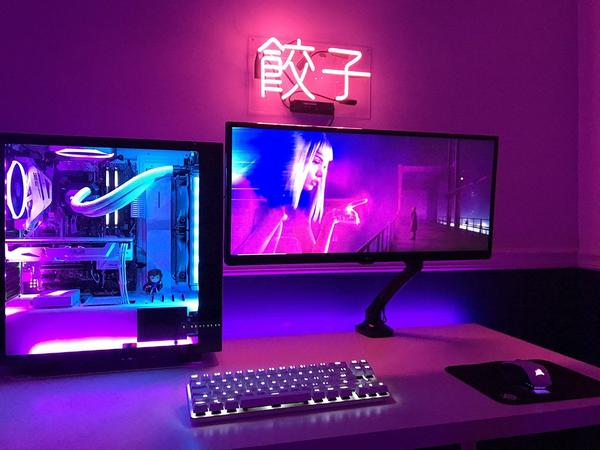
Browse the pages of gaming hangouts like /r/battlestations/ or PCPartPicker and you’ll notice a trend. Most of the awesome PC desktop builds on display are boosted aesthetically by some kind of LED light show. Some tasteful, others downright outrageous!
In the past, adding lighting to a PC case—cold cathodes, no less—required serious component research and potentially complex cabling. But with large quantities of gaming gear sporting integrated LEDs hitting the market, it’s never been easier to pimp your PC.
It’s time to embrace the rainbow.
Further down in this article I’ll be cracking open a PC case to install LED light strips, an illuminated fan, and a dedicated controller to manage the show. But if you’re taking your first steps in illumination, or just want to add a subtle dash of color, there are easier paths available.Most of the leading PC component manufacturers—particularly those supporting gamers—now offer parts with preinstalled RGB LEDs. There are cases with integrated lights, such as the NZXT Noctis 450 ROG shown above. Motherboard lines such as Gigabyte Aorus, Asus ROG Strix, and MSI Gaming Pro also include integrated LEDs and accompanying control applications.
It’s the same story with the latest GPUs. And even heatsinks fitted to coolers, case fans, and (my current favorite) G.Skill’s Trident Z RGB Series RAM modules can be lit. Getting up and running with these components is plug-and-play. Install the kit, download the drivers/controller app, and bring the color.
Of course, when you select components from different manufacturers, coordinating all of those twinkling LEDs—via multiple apps—can be a challenge. But there are signs of collaboration. Asus’ Aura Sync app offers API support, allowing third-party components to synchronize with integrated LEDs. MSI’s Mystic Light Sync boasts partnerships with Corsair, G.Skill, Bitfenix, Phanteks, and others. It’s all coming together, folks.
But if you’re not in the market for a new case, inexpensive, modular LED light strips are the way to go. They can be placed around the insides of your case, using magnetic or peel-off adhesive strips. Usually, they’ll connect to a USB header on your motherboard, supporting power and software control. Look out for newer motherboards sporting dedicated RGB LED headers, which allow easier installation and won’t tie up that USB header you may need for your front-panel ports.
You can source single- and multi-color LED strips from a variety of manufacturers. Check out accessories from NZXT, Phanteks, and IceModz to get started.
If you’re retrofitting an existing PC with LED lights, powering and synchronizing multiple components is made far easier with a dedicated lighting controller. Just as a fan controller regulates power and spin speeds of your case fans, a lighting controller manages power and color synchronization of LED lights.
Today, I’m installing the NZXT HUE+ controller (which retails for $59.99) along with the HUE+ Extension Kit (which costs $20.99) to power three HUE+ light strips and an Aer RGB fan (available for $29.99) that will be installed at the rear of the case.
Together with the integrated LEDs on the NZXT Kraken X62 Liquid Cooler (available for $129.99), which I’ll discuss in a dedicated installation guide, we have the makings of a vibrant, color-saturated desktop PC that deserves a place on /r/battlestations.
Installing the PC lighting controller
The NZXT HUE+ incorporates the controller box itself and a number of accessories, including four magnetic LED lighting strips, power and extension cables, plus a micro-USB cable, which allows control and monitoring via the NZXT CAM application.
I mentioned earlier that LED lighting makes use of your motherboard’s USB header. If you’re already using those headers—for, say, controlling an all-in-one cooler or your PC’s front-panel ports, you may need a workaround. NZXT offers an Internal USB Hub (priced at $24.99) that’s a neat solution. It connects to a spare USB 2.0 header (with a second cable running to your PSU) and provides an additional three USB headers alongside two standard USB-A ports.
The hub was a real lifesaver on this project—be sure to check whether you have sufficient USB headers available on your motherboard before you get started!
Connecting up
Installing the HUE+ lighting controller is quite easy. The mysterious black box is similar in size to a 2.5-inch SSD and, in the box, you’ll find a bracket that allows installation on an available SSD mounting plate in your case.
On the rear of the controller, you’ll see four ports. From left to right, there’s a 5V DC power input, a Micro-USB port, and two four-pin connectors, which are used to connect your lights.
If you can, I suggest connecting the cables to the controller before you mount it in your case. Reaching around the back of the box to secure the cables can be tricky, once the controller is installed.
First, connect one end of the supplied Molex power cable to the DC 5V input, and connect the other to a free Molex connector running from your PCs power supply.
Next, it’s the turn of the Micro-USB cable. You’ll notice that this cable has a regular Micro-USB connector on one end and, at the other, a female connector block that’s designed for a nine-pin USB header. This connects to your motherboard (or USB hub, if required). The great thing about these connectors is that they only fit one way, so it’s relatively easy to slip the connector over the pins.
Finally, we come to the LED strips themselves. Each of the two four-pin ports on the HUE+ controller is able to support four, daisy-chained LED lighting strips. I’ll use one port to connect the strips supplied with the HUE+ and the second port to connect and control the Aer RGB fan.
While connecting the strips to the controller is very simple, now’s the time to figure out the ideal location for your LEDs and how you’ll route the wiring. The HUE+ includes 100mm, 300mm, and two 500mm extension cables, which are used to connect the individual LED strips.
Position your strips where desired (I placed mine around the side window of my case) and then run one extension cable from the first port on the controller to the nearest LED strip connector.
You’ll notice that each strip has a black line running along one edge. Each connector has an arrow pointing to one of its four pin sockets. Ensure that the arrow on the connector lines up with the black line on the strip when you hook everything up, otherwise there’ll be no light show.
Continue routing the extension cables between the LED strips until they’re all connected. You can fine-tune their location later, but for now, lets move on to the Aer RGB fan.
Installing the Aer RGB fan
Installing an LED-rocking case fan is similar to installing any other fan, with one additional step. Alongside the standard four-pin power cable that’s used to spin the blades and monitor speeds, an additional controller cable is required to connect the fan to your lighting controller.
Again, remember that each port on the HUE+ controller can support up to four LED strips, which means you can daisy-chain multiple RGB case fans if you wish. I’m simply connecting a rear fan today.
Swap out your existing fan(s) for the RGB model, then connect the fan’s power cable to an appropriate header on your motherboard. Next, insert the LED controller cable between the socket on the fan labelled IN and the LED controller’s rear port. If you’d like to extend control to other fans, run an extension cable from the first fan’s OUT socket, to the IN socket on the second fan, and so on.
That completes the cabling. Use the thumbscrew supplied with the HUE+ to secure the controller to your PC case, tidy up your cables and close up the case. Let’s power on, and install the NZXT CAM controller application.
Installing the controller app and drivers
When you first start up your PC, you may notice some unexpected behavior from your LED strips. They may glow white, or may not glow at all. Don’t panic—like any hardware device, the controller will need drivers (and perhaps a firmware update) to complete your installation.
Check the controller manual, or the manufacturer’s website, for details of any software you’ll need to manage your lighting. For the NZXT HUE+ controller, we’ll use an application called CAM, which offers a range of features including hardware monitoring, PC overclocking, and lighting control.
On the first run, the CAM application will install the required hardware drivers and, if required, a firmware update to ensure the HUE+ controller is running at its best. At this point, you should see your LED lighting spring into life (if it hasn’t already). If it doesn’t, check the bottom of the CAM window to ensure the controller has been recognized.
You should see one or two channels available (one for each controller port) with sliders allowing you to toggle power to each. For more granular control, hit the gear icon on the right.
You’ll be taken to the Tuning tab, where you can check that all the LED lights you’ve installed are listed. In the example above, you can see individual controls for the HUE+ Unit Light (a small, white LED light embedded in the top of the controller), the single Aer RGB fan at the rear of the case, and three LED strips I installed around the PC’s side window. Again, toggle switches allow you to power each channel, but for ultimate control, click the Edit Settings button and let’s check out what these lights can do!
Time to put on a show
Beware! You can lose hours of your life customizing light settings—you’ll find a host of effects available that are tons of fun to play with. Spend some time experimenting with the presets and then you can fine-tune your LED settings to perfection.
In the NZXT CAM app, effects are arranged under five tabs: Preset, Smart, Custom, Audio, and Games. Alternative controllers support a similar range of effects, with perhaps one or two unique offerings.
As you can see in the screenshot above, the Preset menu supports popular effects such as fixed colors, breathing, fading, alternating colors, candlelight, and a psychedelic spectrum wave cycle (which is my favorite). Each selection can be further tweaked, if needed, with direction and speed settings.
If you’ve placed your PC case on the desk, you may wish to use your LEDs for alerts, such as high CPU or GPU temperatures, low frame rates, and so on.
Music fans can sync their lighting to audio output, tuning colors and rhythms to specified levels, bass response, and other attributes.
Dig around and you should also find custom options for fine control, lighting profiles tuned for specific games, and more. Exploring and experimenting with the wealth of options available is great fun.
If you’ve yet to sample the psychedelic delights of PC lighting, it’s never been easier to get up and running. Starter kits make for great installation projects, and with so much RGB-infused kit on the market, your only problem will be knowing where to stop!


