If you're working from home and anything like me right now, you may be familiar with a little something I like to call the Perfectly Timed Interruption.
No matter how quiet and flexible 90% of your day may be, the Perfectly Timed Interruption never fails to find that one moment when you really just can't be disturbed. Maybe you're having a videoconferencing call with a particularly important client. Maybe you're leading a team meeting. Or maybe you're recording a podcast — or even appearing live on a national news program (look at you!).
Invariably, that's the moment when your pint-sized progeny, your significant other, or your top-secret live-in marsupial will decide to bounce into the room singing a song or making adorably weird wallaby noises (as my three-year-old frequently likes to do). Whether you're new to working at home or a basement-dwelling veteran like yours truly, it's an unavoidable part of the equation.
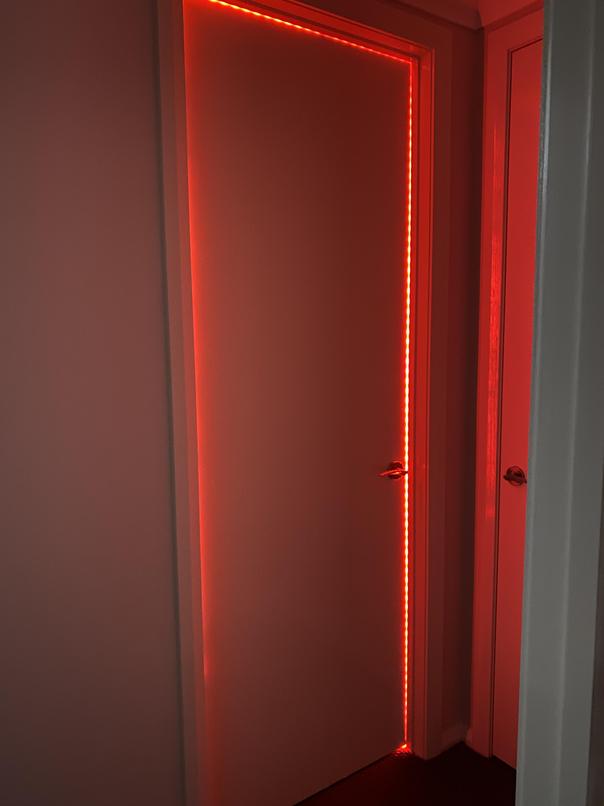
Or so I thought — until an ambitious and slightly crazy-seeming idea popped into this juicy old noodle o' mine: What if I had an "ON AIR" light of sorts — a bulb that'd sit outside my home office door and light up whenever I'm in the midst of something that can't be interrupted? It'd serve as a signal to everyone that the greasy wildebeest within should not be disturbed whilst the light is lit. When the light is off, well, enter as you must and at your own risk (as usual).
I'm not just thinking about a simple lamp with a switch on it, either. (Come on — what kind of column do you think you're reading here?!) I'm envisioning a fully automated, intelligent system that'd know when I'm busy and turn the light on by itself and then off again after — without any thought or action required on my part. Because, clearly, if active thought is required, my rapidly decaying ol' noggin will fail.
As you've probably guessed by now, there is indeed a way to accomplish this — and it's actually quite easy to set up. The only requirement is that you have an internet-connected smart bulb like a Hue light (the kind with the Bridge hub attached; you can find starter kits for $70 and up, depending on how many and what types of bulbs you want). And once you do the initial five-minute configuration, it'll just work from there on out — almost, dare I say it, like magic.
Here's how to make it happen:
1. Go sign up for Zapier, if you haven't already. It's an established, reputable service for making different apps and technologies work together in some pretty powerful ways. And it's completely free to use for these purposes, though higher-functioning and team-driven subscription plans are also available.
2. Open up this Zap — a fancy way to say recipe or automation in Zapier lingo. Follow the steps to sign into Google Calendar and grant Zapier the permissions it needs in order to access your events. (Using Outlook instead of Google Calendar? Go to this Zap instead; it's the same basic thing but with Microsoft instead of Google acting as the associated service.)
3. Zapier will prompt you to choose which calendar within your account you want to use, if you have multiple calendars configured. Pick whichever one will be most relevant to this purpose (or just pick the default calendar, if you only have one).
4. Next, you'll see a field asking how long before an event the process should be triggered. You'll need to leave that set as the default "15" with a free Zapier account, as technically, the service only checks in on your Zaps once every 15 minutes. That being said, it's always ended up starting the process at exactly the right time for me, so go figure.
5. Perhaps the most important step of all is the "Search Term" field. There, you'll want to enter whatever word you want to act as the triggering variable within your events — so that an event in your calendar will activate the light only if that word is present in its title. You could use something obvious that'll come up contextually, like "meeting," or you could set up a specific code word that you can then add into events when you want the light to be activated.
Once you've got all that filled out, Zapier will prompt you to test the connection — and that's it for this first part of the process. Next, you'll just need to follow the service's steps to connect and configure your Hue account. Just note that it'll require you to select an entire room to activate instead of an individual light, so you may need to set up a special room for this purpose within the Hue Android app with whatever light (or lights) you want included.
All that's left after that is to click the button at the bottom of the screen to turn your Zap on — and then wait for your first associated event to begin.
If you want to take your smart home-office automation up one more notch from there, you can complete the circle and create a second Zap that'll turn your light off when any relevant event is scheduled to end. Just open up this page, select "Event Ended" as the trigger, select "Turns lights off" as the action, and then fill in the rest of the fields and activate the Zap.
And with that, my fellow home-worker, you can officially say so long to the Perfectly Timed Interruption — and say hello to some automated awesomeness that'll bring a little more focus into your life.
Sign up for my weekly newsletter to get more practical tips, personal recommendations, and plain-English perspective on the news that matters.
[Android Intelligence videos at Computerworld]


